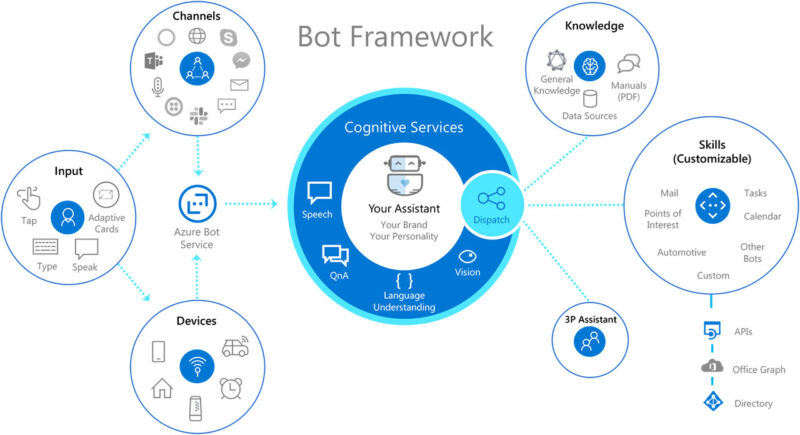
In this blog post, we’ll show you a short demo, how to make a chatbot using Microsoft’s Bot Framework SDK for Node.js.
Chatbots are helpful tools in today’s digital world, and with the right tools, making one is easier than you think. Let’s walk through the steps and get your chatbot up and running!

Prerequisites:
- Basic understanding of Node.js and JavaScript.
- Node.js and npm (Node Package Manager) installed on your machine.
1. Setting Up Your Development Environment:
Ensure you have the latest versions of Node.js and npm installed. You can check your versions with:
node --version npm --versionUsing Yeoman and the Bot Builder Yeoman generator:
- First, install Yeoman and the Bot Builder Yeoman generator:
npm install -g yo generator-botbuilder- Next, generate your new bot project:
yo botbuilderWhen prompted, select the ‘Echo Bot’ template. This will scaffold a simple bot that parrots back user messages, serving as a foundational structure.
3. Dive into Your Bot’s Code Structure:
Navigate to your project folder and you’ll find the primary bot logic in the bot.js file:
- Echo Bot Logic: The bot listens for any user messages and sends them back, verifying your setup.
- Adapters: Adapters help your bot interface with various channels (e.g., web chat, Microsoft Teams). The default is typically set up for development purposes.
4. Running and Testing Your Bot Locally:
- Inside your project directory, install any necessary dependencies:
npm install- Start your bot with:
npm startYour bot should now be running locally, usually on
http://localhost:3978/api/messages.To interact with your bot, download and install the Bot Framework Emulator. Launch the emulator and connect to your bot using the provided endpoint.
5. Enhancing Your Bot:
The Bot Framework SDK offers an array of packages to expand your bot’s functionalities:
- Dialogs: Implement structured multi-turn conversations.
- LUIS: Incorporate the Language Understanding Intelligent Service for natural language processing.
- QnA Maker: Easily implement a FAQ section for your bot.
As you grow familiar with the SDK, you can explore its documentation to discover more features and integrations.
6. Deploying Your Bot:
Once you’re satisfied with your bot’s performance on the local setup:
- Choose a cloud platform, like Microsoft Azure, to host your bot.
- Follow the platform-specific instructions to deploy your Node.js application.
- Register your bot on the Bot Framework Portal to obtain credentials and enable various channels for user interaction.
7. Build an Intelligent Bot with Microsoft Azure
Now, if you’re curious about how this can be implemented in Azure, check out the video below.
Contact GDS for IT Consulting Services to get the most out of your IT setup. Let’s talk about how our services can help your business.
Contact us for more information or visit our blog

