Terraform enables the definition, preview, and deployment of cloud infrastructure. Using Terraform, you can create configuration files using HCL syntax. The HCL syntax allows you to specify the cloud provider – such as Azure – and the elements that make up your cloud infrastructure. After you create your configuration files, you create an execution plan that allows you to preview your infrastructure changes before they’re deployed. Once you verify the changes, you apply the execution plan to deploy the infrastructure.
Terraform state is used to reconcile deployed resources with Terraform configurations. State allows Terraform to know what Azure resources to add, update, or delete.
By default, Terraform state is stored locally, which isn’t ideal for the following reasons:
– Local state doesn’t work well in a team or collaborative environment.
– Terraform state can include sensitive information.
– Storing state locally increases the chance of inadvertent deletion.
Let create a Demo to deploy an automation backend state file in Azure,
Prerequisites:
– Azure Account, If you don’t have an Azure subscription, create a free account before you begin.
– Configure Terraform: If you haven’t already done so, configure Terraform using one of the following options.
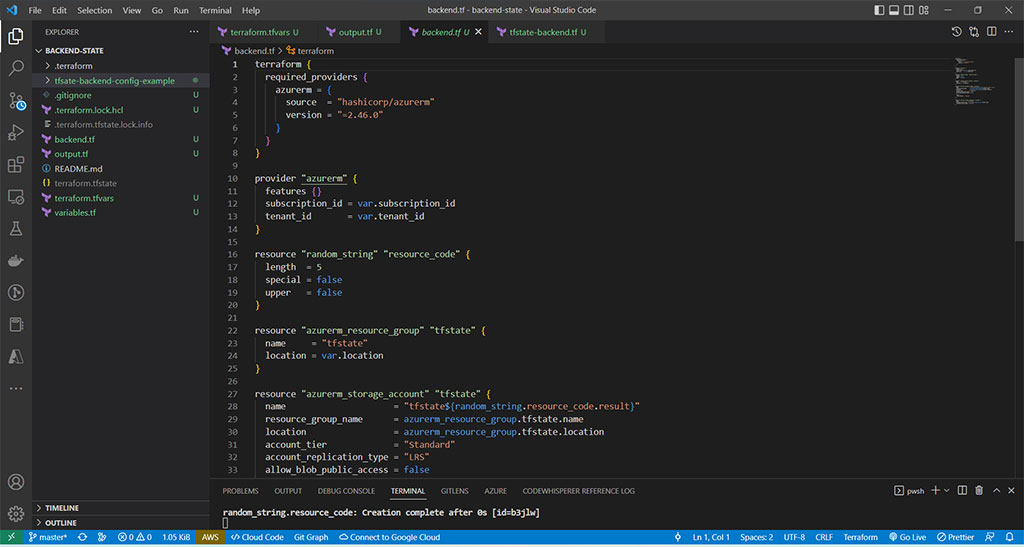
subscription_id       = "asfasf-afasfsafsaf-asfasfas-asfafsaf"
tenant_id             = " fdgdgd-dgfgdffdgf-dgfddgfdf-dgfdggdg"
location              = "eastus"
let’s create it,
terraform init
terraform plan
terraform apply -auto-approve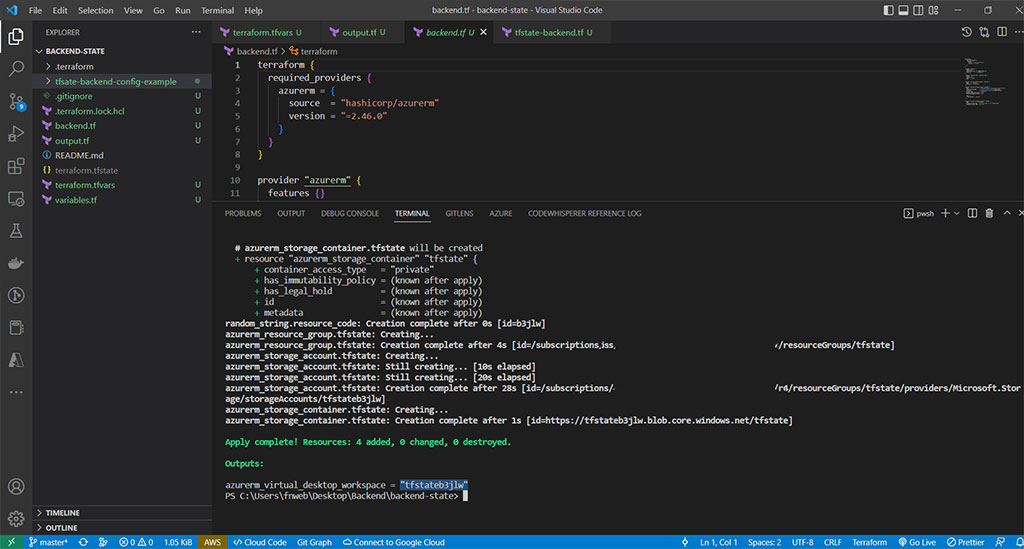
Copy the result of the output obtained, we will need it later,
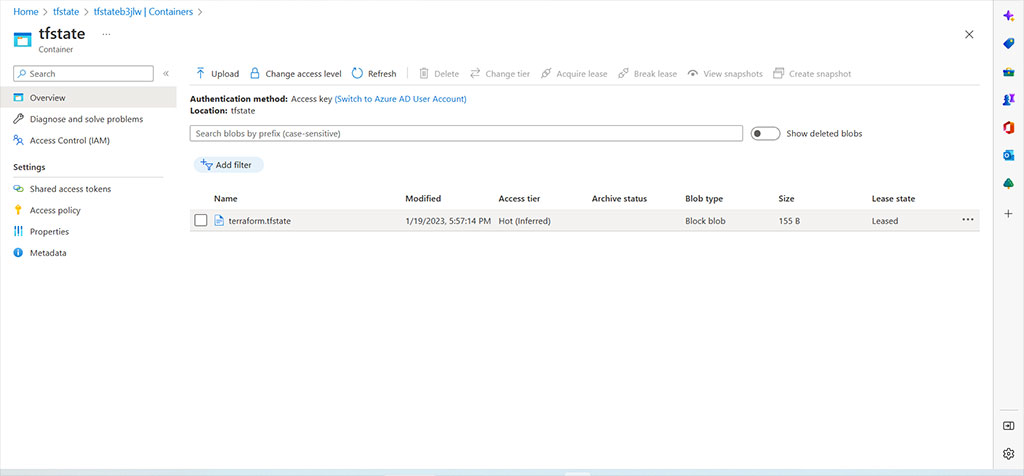
azurerm_storage_account = "tfstateb3jlw"Step 3 – Once the previous step is done, go to the Azure portal and check the container,
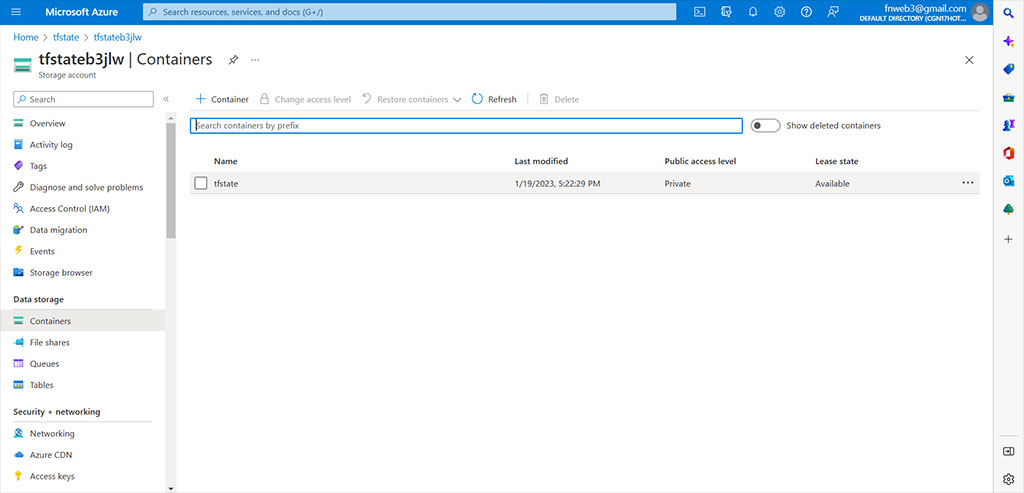
Step 4 – We already have configured the container that will host our terraform state file, go to the folder with the name “backend-config-example” in the repository, this is a example and add the azurerm_storage_account in the backend-example.tf
    backend "azurerm" {
        resource_group_name  = "tfstate"
        storage_account_name = "<azurerm_storage_account>"
        container_name       = "tfstate"
        key                  = "terraform.tfstate"
    }
It will look like this, is important to know that the key path must be unique for each Terraform module, folder, or configuration.
    backend "azurerm" {
        resource_group_name  = "tfstate"
        storage_account_name = "tfstateb3jlw"      #output azurerm_storage_account
        container_name       = "tfstate"
        key                  = "terraform.tfstate"
    }
Step 5 – Deploy the resources in the backend-config-example folder and let see what happen,
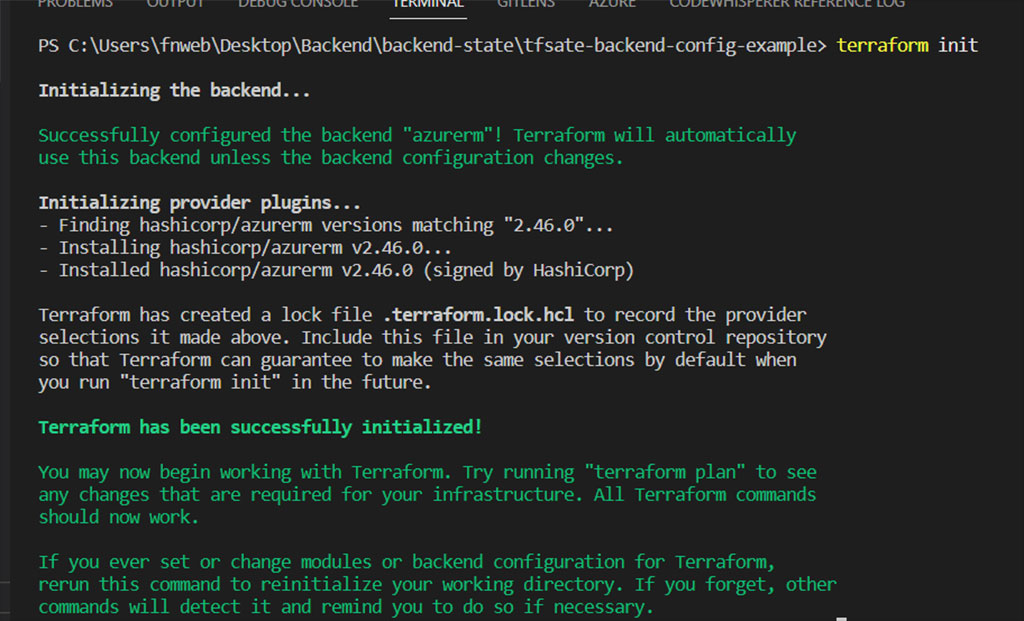
Good news, successfully configured the backend, deploy and go to container tfstate in the portal to check,
terraform destroy -auto-approveContact us for more information or visit our blog.

